> ## Documentation Index
> Fetch the complete documentation index at: https://botpress-pb-update-api.mintlify.site/llms.txt
> Use this file to discover all available pages before exploring further.
# Autonomous Node
The Autonomous Node **uses AI to make decisions**—like what your bot should say or what tools it should use.
Unlike a [standard Node](/studio/concepts/nodes/introduction#standard-node), which executes its [Cards](/studio/concepts/cards) one by one, the Autonomous Node uses a Large Language Model (LLM) to decide when to execute tools. It can understand the conversation's context, write responses to users, and leverage the tools you give it.
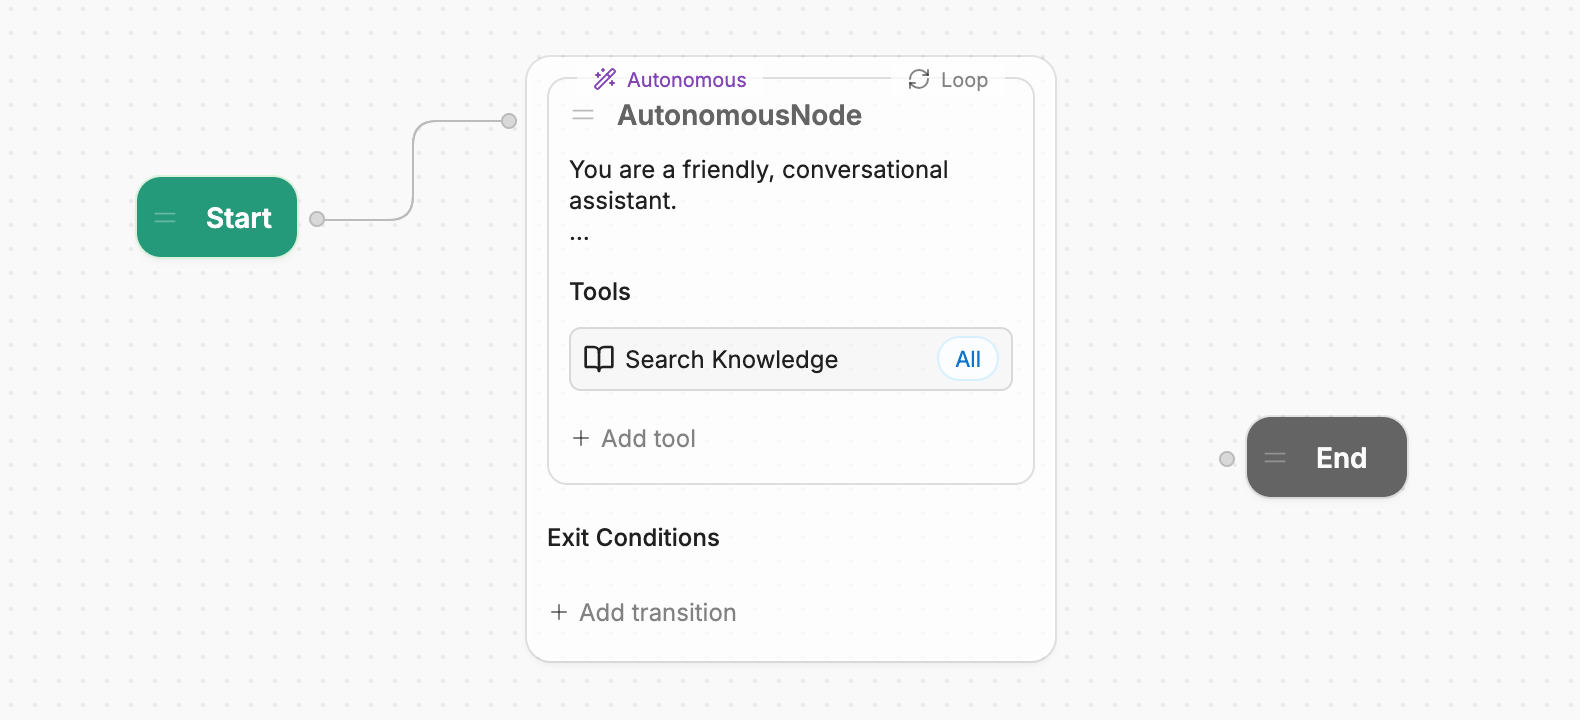
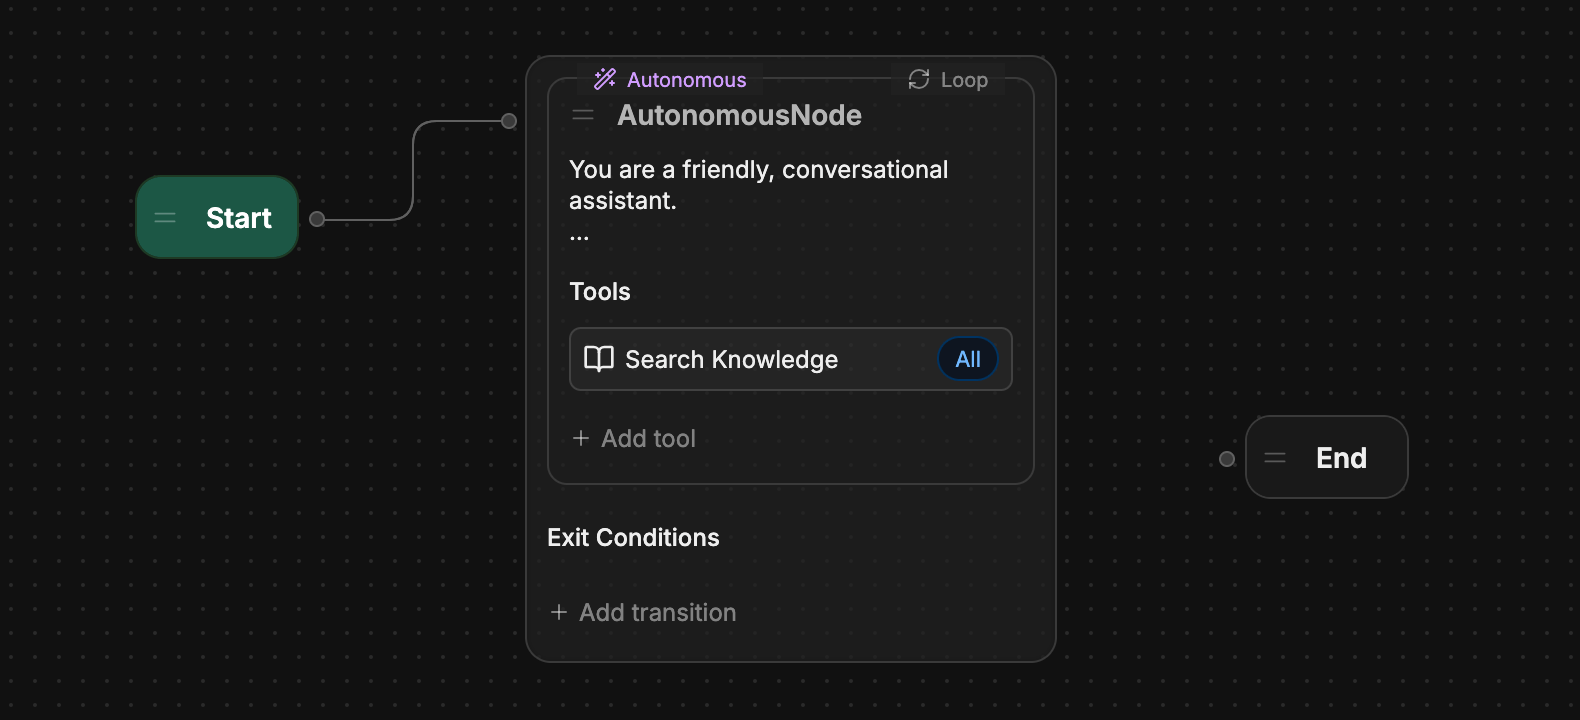 You can use the Autonomous Node to build an independent AI agent that:
* Aligns with your brand
* Learns your users' needs
* Doesn't need human intervention to take actions
***
## Add an Autonomous Node
By default, every bot has an Autonomous Node installed in its main [Workflow](/studio/concepts/workflows). If you need to create a new Autonomous Node:
1. Right-click anywhere in a Workflow.
2. Select **Autonomous Node**.
***
## Configuration
If your main Workflow contains an Autonomous Node, you can quickly update its configuration from the Studio's [Home](/studio/concepts/home) page.
Select your Autonomous Node to open its configuration menu. Here's a breakdown of the configuration options:
* **Instructions**: This field is your Autonomous Node's main prompt. Provide clear guidelines in this section—the more specific you are, the better the agent’s decision-making.
For a detailed guide to prompting, check out the [Prompting tips](#prompting-tips) section.
* **Variables**: This section lets you [give your Autonomous Node access to variables](#give-access-to-variables).
* **Tools**: This section lets you [add tools](#add-tools) that the Autonomous Node can use.
* **Search Knowledge**: This section lets you specify which Knowledge Bases your Autonomous Node can refer to.
* **Workflows**: This section lets you provide additional [Workflows](/studio/concepts/workflows) to the Autonomous Node, which it can execute during a conversation.
* **Exit Conditions**: This section lets you define the conditions under which your Autonomous Node should [exit its loop](#advanced-settings).
### Add tools
You can add tools to your Autonomous Node to expand its capabilities. The LLM powering the Autonomous Node will decide when to use these tools based on your instructions (and the conversation's context).
You can refer to tools using natural language in your instructions—however, your bot may generate better responses if you [refer to them using code](#refer-to-tools-directly).
### Give access to variables
By default, Autonomous Nodes can't read or update [variables](/studio/concepts/variables/overview). If you need to give an Autonomous Node access to a variable:
1. Select the Autonomous Node to open its configuration menu.
2. Under **Variables**, select **+ Add variable(s)**.
3. Select any variable to let the Autonomous Node read it.
4. If you also want to give the Autonomous Node write access to the variable, check **Allow write access**.
If you don't see the option to **+ Add variable(s)**, make sure you've [created at least one variable](/studio/concepts/variables/overview#create-a-variable).
### Make your Autonomous Node non-conversational
By default, your Autonomous Node responds to every user message in a loop until one of its [exit conditions](#configuration) are met. If you'd rather your Autonomous Node just execute logic without responding to user messages, you can disable **Advanced Settings > Loops until exit condition**.
When this setting is disabled, your Autonomous Node:
1. Processes the user's message
2. Performs some action (if necessary), like executing a tool
3. Transitions to the next Node in the Workflow without responding to the user.
This is useful if you want AI to handle logic behind the scenes, but still hard-code the bot's response.
### Override default models
By default, all Autonomous Nodes use the LLMs set in your [Bot Settings](/studio/concepts/bot-settings#default-llms). However, you can override these models for individual Autonomous Nodes if needed:
1. Select the Autonomous Node to open its configuration menu.
2. Open **Advanced settings**.
3. Enable either:
* **Override default model**: Overrides the default LLM used for generating responses
* **Override default RAG model**: Overrides the default LLM used for Retrieval-Augmented Generation (RAG) tasks, like answering questions based on [Knowledge Base](/studio/concepts/knowledge-base/introduction) content
### Enable Vision Agent
You can enable the [Vision Agent](/studio/concepts/agents/vision-agent) if you want your Autonomous Node to extract text content from incoming images. Toggle **Advanced Settings > Vision Agent > Extract from Incoming Images** to enable or disable this option.
***
## Prompting tips
Here are some tips and guidelines to help you write better prompts for the Autonomous Node.
You can also check out the following resources for more general information about successful LLM prompting:
* [Best practices for prompt engineering with the OpenAI API](https://help.openai.com/en/articles/6654000-best-practices-for-prompt-engineering-with-the-openai-api)
* [Building Systems with the ChatGPT API](https://www.deeplearning.ai/short-courses/building-systems-with-chatgpt/)
* [ChatGPT Prompt Engineering for Developers](https://www.deeplearning.ai/short-courses/chatgpt-prompt-engineering-for-developers/)
### Use Markdown
To create a structured prompt, we recommend using [Markdown syntax](https://www.markdownguide.org/basic-syntax/) like headers, bullet points, and bold text. This helps the Autonomous Node recognize the hierarchy of your instructions.
```markdown Instructions wrap theme={null}
## Identity
You are the Customer Support AI Agent for [COMPANY NAME]. Your role is to interact with customers, address their inquiries, and provide assistance with common support topics.
## Scope
- Focus on customer inquiries about orders, billing, account issues, and general support.
- **Don't handle advanced technical support or sensitive financial issues**.
- Redirect or escalate issues outside your expertise to a human agent.
## Response Style
- Maintain a friendly, clear, and professional tone.
- Keep responses brief and to the point.
- **Never use unexplained jargon or acronyms.**
- **Always confirm and echo user inputs before proceeding.**
```
### Be specific
Instead of vague commands, use specific language that guides the agent clearly. The more specific you are, the better chance you have of your Autonomous Node behaving as expected.
#### Don't over-prompt!
If your prompt is long and detailed but the Autonomous Node isn't behaving how you'd expect, **try trimming the prompt down**. An overly convoluted (or contradictory) prompt can confuse the LLM and lead to poor performance or hallucinations.
### Guide the conversation
Provide clear instructions on how the conversation should flow. This could include:
* Greeting instructions
* Conditions for [transitioning to sub-Workflows](/studio/concepts/workflows#transition-to-a-workflow)
* Closing instructions
```markdown Instructions wrap theme={null}
## Instructions
- **Greeting**: Start every conversation with a friendly welcome.
_Example_: "Hi, welcome to [COMPANY NAME] Support! How can I help you today?"
- **Escalation**: When a customer query becomes too complex or sensitive, transition to the "Human agent" sub-Workflow and notify the customer that you'll escalate the conversation to a human agent.
_Example_: "I’m having trouble resolving this. Let me get a human agent to assist you further."
- **Closing**: End interactions by confirming that the customer's issue has been addressed.
_Example_: "Is there anything else I can help you with today?"
```
### Refer to tools directly
Your bot uses various code-based tools to perform actions. Although you can write your instructions in natural language, your bot may generate better responses if you refer to these tools directly.
You can view a full list of tools your bot currently has access to in the [Inspect window](#inspect-window).
Here's a list of built-in tools that every bot can use by default:
* `global.think`: Allows the Node to process a response or pause briefly.
* `global.search`: Queries an internal knowledge base for relevant information.
* `clock.setReminder`: Sets a reminder for future tasks or responses.
* `global.Message`: Sends a text message to the user as a response.
This prompt tells the Autonomous Node to search the web when it can't find an answer in the internal Knowledge Base:
```markdown Instructions wrap theme={null}
If you can't answer the user's question with `global.search`, use `browser.webSearch`.
```
This prompt narrows when each search tool runs so the Node doesn't pull unrelated content:
```markdown Instructions wrap theme={null}
**Tool boundaries**
- Use `global.search` only for questions about [your scoped topic—for example course content or order support]. Do **not** use it for general pricing, marketing, or unrelated small talk unless the user explicitly needs a documented policy from the knowledge base.
- Use `browser.webSearch` only when `global.search` does not contain a sufficient answer **and** the question still falls within that same scope. Do not use web search for out-of-scope requests—politely decline instead.
```
When the base URL lives in a [Workflow variable](/studio/concepts/variables/scopes/workflow), this prompt tells the Autonomous Node how to add a start time (replace the variable name with one you have given the Node access to):
```markdown Instructions wrap theme={null}
**Video links**
If the user wants a link to the lesson video, the base URL is in `workflow.contentLinks`. To jump to a specific second, append a `t` query in seconds (e.g. 15 seconds → add `?t=15` or `&t=15` depending on whether the URL already has query parameters).
```
Here are the tools your bot uses to make transitions:
* `global.`: [Transitions to a sub-Workflow](/studio/concepts/workflows#transition-to-a-workflow).
* `workflow.transition`: Transitions to a Node that's connected to the Autonomous Node.
This prompt tells the Autonomous Node to transition to a custom sub-Workflow (`global.checkout`) when the user wants to checkout with their current cart:
```markdown Instructions wrap theme={null}
When the user wants to checkout with their current cart, use `global.checkout`.
```
This pattern is for leaving the Autonomous Node for a structured sub-Workflow after saving a value from the conversation. The Autonomous Node needs [read and write access](#give-access-to-variables) to the variable you mention:
```markdown Instructions wrap theme={null}
When the user asks for deeper details about an email they mentioned, use `workflow.transition` to move to the **Enrich contact** Node. Before transitioning, set `workflow.requestedEmail` to that email address.
```
Replace the Node name, variable name, and trigger phrase with whatever matches your bot.
This prompt combines `global.Message` with `workflow.transition` when the user picks a numeric option. Connect each target with a **Transition** card on the canvas first so `workflow.transition` is valid:
```markdown Instructions wrap theme={null}
If the user sends **1**, thank them briefly with `global.Message`, then use `workflow.transition` to go to the **Self-serve** node. If they send **2**, use `workflow.transition` to go to the **Guided setup** node.
```
You can also directly refer refer to any tools from external integrations.
This prompt tells the Autonomous Node to start a [Human-in-the-loop (HITL)](/integrations/integration-guides/hitl/introduction) session when the user indicates they'd like to speak to a live agent:
```markdown Instructions wrap theme={null}
When the user indicates they'd like to speak to a live agent, use `hitl.startHitl`.
```
***
## Example instructions
Here's an example of complete instructions for an Autonomous Node:
```markdown Instructions expandable wrap theme={null}
## Identity
You are the Customer Support AI Agent for [COMPANY NAME]. Your role is to interact with customers, address their inquiries, and provide assistance with common support topics.
## Scope
- Focus on customer inquiries about orders, billing, account issues, and general support.
- Don't handle advanced technical support or sensitive financial issues.
- Redirect or escalate issues outside your expertise to a human agent.
## Responsibility
- Initiate interactions with a friendly greeting.
- Guide the conversation based on customer needs.
- Provide accurate and concise information.
- Escalate to a human agent when customer inquiries exceed your capabilities.
## Response Style
- Maintain a friendly, clear, and professional tone.
- Keep responses brief and to the point.
- Use buttons for quick replies and easy navigation whenever possible.
## Ability
- Delegate specialized tasks to AI-Associates or escalate to a human when needed.
## Guardrails
- **Privacy**: Respect customer privacy; only request personal data if absolutely necessary.
- **Accuracy**: Provide verified and factual responses coming from Knowledge Base or official sources. Avoid speculation.
## Instructions
- **Greeting**: Start every conversation with a friendly welcome.
_Example_: "Hi, welcome to [COMPANY NAME] Support! How can I help you today?"
- **Escalation**: When a customer query becomes too complex or sensitive, notify the customer that you'll escalate the conversation to a human agent.
_Example_: "I’m having trouble resolving this. Let me get a human agent to assist you further."
- **Closing**: End interactions by confirming that the customer's issue has been addressed.
_Example_: "Is there anything else I can help you with today?"
```
***
## Troubleshooting
This section contains troubleshooting tips to understand how your Autonomous Node is behaving, why it made certain decisions, and how you can course-correct when it's not behaving as expected.
### Check the Inspect window
The **Inspect** window displays information about the Autonomous Node's process, reasoning, and functions. If you notice that the Node isn’t responding correctly or seems to ignore certain instructions, inspecting will reveal whether it has misunderstood the prompt or failed to execute a specific tool.
To access the **Inspect** window:
1. Start a chat with your bot in the Studio's [emulator](/studio/concepts/emulator).
2. Select **Inspect** on any of its responses.
Here's a breakdown of how to use the **Inspect** window:
This section displays all tools available to the Autonomous Node. Each time you add a new Card or make a change to the Node's configuration, the **Tools** list is updated.
* Ensure that the tools listed match what you expect to be available in the Node's decision-making process.
* Ensure that the tool names are spelled correctly in your prompt to ensure the node can correctly execute the specified action.
The Autonomous Node typically tries to execute all instructions within one or two iterations. The number of iterations depends on the complexity of the prompt and how the Node analyzes it.
For more complex tasks, the Node might take multiple iterations to gather data, make decisions, or fetch external information.
By reviewing the Iterations tab, you can understand:
* How many iterations were required for the Node to reach its final decision
* What caused the Node to take multiple steps (e.g., fetching additional data from tools like `global.search` or `browser.webSearch`)
* Why a particular outcome was achieved
### Choose the right model
Lower-performance LLMs may struggle with the complexity of operations typically executed by the Autonomous Node. For this reason, we recommend using a high-performing model to power Autonomous Nodes, roughly equivalent to a model like OpenAI's GPT-4.1.
A smaller LLM might result in parts of the prompt being truncated, specifically the definition wrapper that Botpress adds to ensure the LLM understands how the tools function, or what parameters are required.
### Check your LLMz version
Always make sure you are using the latest stable version of LLMz. This is the autonomous engine that directs the Autonomous Node to work. It also contains bug fixes, making the prompts more agnostic to variance between LLMs.
You can check/change your LLMz version in your [Bot Settings](/studio/concepts/bot-settings#llmz-version).
You can use the Autonomous Node to build an independent AI agent that:
* Aligns with your brand
* Learns your users' needs
* Doesn't need human intervention to take actions
***
## Add an Autonomous Node
By default, every bot has an Autonomous Node installed in its main [Workflow](/studio/concepts/workflows). If you need to create a new Autonomous Node:
1. Right-click anywhere in a Workflow.
2. Select **Autonomous Node**.
***
## Configuration
If your main Workflow contains an Autonomous Node, you can quickly update its configuration from the Studio's [Home](/studio/concepts/home) page.
Select your Autonomous Node to open its configuration menu. Here's a breakdown of the configuration options:
* **Instructions**: This field is your Autonomous Node's main prompt. Provide clear guidelines in this section—the more specific you are, the better the agent’s decision-making.
For a detailed guide to prompting, check out the [Prompting tips](#prompting-tips) section.
* **Variables**: This section lets you [give your Autonomous Node access to variables](#give-access-to-variables).
* **Tools**: This section lets you [add tools](#add-tools) that the Autonomous Node can use.
* **Search Knowledge**: This section lets you specify which Knowledge Bases your Autonomous Node can refer to.
* **Workflows**: This section lets you provide additional [Workflows](/studio/concepts/workflows) to the Autonomous Node, which it can execute during a conversation.
* **Exit Conditions**: This section lets you define the conditions under which your Autonomous Node should [exit its loop](#advanced-settings).
### Add tools
You can add tools to your Autonomous Node to expand its capabilities. The LLM powering the Autonomous Node will decide when to use these tools based on your instructions (and the conversation's context).
You can refer to tools using natural language in your instructions—however, your bot may generate better responses if you [refer to them using code](#refer-to-tools-directly).
### Give access to variables
By default, Autonomous Nodes can't read or update [variables](/studio/concepts/variables/overview). If you need to give an Autonomous Node access to a variable:
1. Select the Autonomous Node to open its configuration menu.
2. Under **Variables**, select **+ Add variable(s)**.
3. Select any variable to let the Autonomous Node read it.
4. If you also want to give the Autonomous Node write access to the variable, check **Allow write access**.
If you don't see the option to **+ Add variable(s)**, make sure you've [created at least one variable](/studio/concepts/variables/overview#create-a-variable).
### Make your Autonomous Node non-conversational
By default, your Autonomous Node responds to every user message in a loop until one of its [exit conditions](#configuration) are met. If you'd rather your Autonomous Node just execute logic without responding to user messages, you can disable **Advanced Settings > Loops until exit condition**.
When this setting is disabled, your Autonomous Node:
1. Processes the user's message
2. Performs some action (if necessary), like executing a tool
3. Transitions to the next Node in the Workflow without responding to the user.
This is useful if you want AI to handle logic behind the scenes, but still hard-code the bot's response.
### Override default models
By default, all Autonomous Nodes use the LLMs set in your [Bot Settings](/studio/concepts/bot-settings#default-llms). However, you can override these models for individual Autonomous Nodes if needed:
1. Select the Autonomous Node to open its configuration menu.
2. Open **Advanced settings**.
3. Enable either:
* **Override default model**: Overrides the default LLM used for generating responses
* **Override default RAG model**: Overrides the default LLM used for Retrieval-Augmented Generation (RAG) tasks, like answering questions based on [Knowledge Base](/studio/concepts/knowledge-base/introduction) content
### Enable Vision Agent
You can enable the [Vision Agent](/studio/concepts/agents/vision-agent) if you want your Autonomous Node to extract text content from incoming images. Toggle **Advanced Settings > Vision Agent > Extract from Incoming Images** to enable or disable this option.
***
## Prompting tips
Here are some tips and guidelines to help you write better prompts for the Autonomous Node.
You can also check out the following resources for more general information about successful LLM prompting:
* [Best practices for prompt engineering with the OpenAI API](https://help.openai.com/en/articles/6654000-best-practices-for-prompt-engineering-with-the-openai-api)
* [Building Systems with the ChatGPT API](https://www.deeplearning.ai/short-courses/building-systems-with-chatgpt/)
* [ChatGPT Prompt Engineering for Developers](https://www.deeplearning.ai/short-courses/chatgpt-prompt-engineering-for-developers/)
### Use Markdown
To create a structured prompt, we recommend using [Markdown syntax](https://www.markdownguide.org/basic-syntax/) like headers, bullet points, and bold text. This helps the Autonomous Node recognize the hierarchy of your instructions.
```markdown Instructions wrap theme={null}
## Identity
You are the Customer Support AI Agent for [COMPANY NAME]. Your role is to interact with customers, address their inquiries, and provide assistance with common support topics.
## Scope
- Focus on customer inquiries about orders, billing, account issues, and general support.
- **Don't handle advanced technical support or sensitive financial issues**.
- Redirect or escalate issues outside your expertise to a human agent.
## Response Style
- Maintain a friendly, clear, and professional tone.
- Keep responses brief and to the point.
- **Never use unexplained jargon or acronyms.**
- **Always confirm and echo user inputs before proceeding.**
```
### Be specific
Instead of vague commands, use specific language that guides the agent clearly. The more specific you are, the better chance you have of your Autonomous Node behaving as expected.
#### Don't over-prompt!
If your prompt is long and detailed but the Autonomous Node isn't behaving how you'd expect, **try trimming the prompt down**. An overly convoluted (or contradictory) prompt can confuse the LLM and lead to poor performance or hallucinations.
### Guide the conversation
Provide clear instructions on how the conversation should flow. This could include:
* Greeting instructions
* Conditions for [transitioning to sub-Workflows](/studio/concepts/workflows#transition-to-a-workflow)
* Closing instructions
```markdown Instructions wrap theme={null}
## Instructions
- **Greeting**: Start every conversation with a friendly welcome.
_Example_: "Hi, welcome to [COMPANY NAME] Support! How can I help you today?"
- **Escalation**: When a customer query becomes too complex or sensitive, transition to the "Human agent" sub-Workflow and notify the customer that you'll escalate the conversation to a human agent.
_Example_: "I’m having trouble resolving this. Let me get a human agent to assist you further."
- **Closing**: End interactions by confirming that the customer's issue has been addressed.
_Example_: "Is there anything else I can help you with today?"
```
### Refer to tools directly
Your bot uses various code-based tools to perform actions. Although you can write your instructions in natural language, your bot may generate better responses if you refer to these tools directly.
You can view a full list of tools your bot currently has access to in the [Inspect window](#inspect-window).
Here's a list of built-in tools that every bot can use by default:
* `global.think`: Allows the Node to process a response or pause briefly.
* `global.search`: Queries an internal knowledge base for relevant information.
* `clock.setReminder`: Sets a reminder for future tasks or responses.
* `global.Message`: Sends a text message to the user as a response.
This prompt tells the Autonomous Node to search the web when it can't find an answer in the internal Knowledge Base:
```markdown Instructions wrap theme={null}
If you can't answer the user's question with `global.search`, use `browser.webSearch`.
```
This prompt narrows when each search tool runs so the Node doesn't pull unrelated content:
```markdown Instructions wrap theme={null}
**Tool boundaries**
- Use `global.search` only for questions about [your scoped topic—for example course content or order support]. Do **not** use it for general pricing, marketing, or unrelated small talk unless the user explicitly needs a documented policy from the knowledge base.
- Use `browser.webSearch` only when `global.search` does not contain a sufficient answer **and** the question still falls within that same scope. Do not use web search for out-of-scope requests—politely decline instead.
```
When the base URL lives in a [Workflow variable](/studio/concepts/variables/scopes/workflow), this prompt tells the Autonomous Node how to add a start time (replace the variable name with one you have given the Node access to):
```markdown Instructions wrap theme={null}
**Video links**
If the user wants a link to the lesson video, the base URL is in `workflow.contentLinks`. To jump to a specific second, append a `t` query in seconds (e.g. 15 seconds → add `?t=15` or `&t=15` depending on whether the URL already has query parameters).
```
Here are the tools your bot uses to make transitions:
* `global.`: [Transitions to a sub-Workflow](/studio/concepts/workflows#transition-to-a-workflow).
* `workflow.transition`: Transitions to a Node that's connected to the Autonomous Node.
This prompt tells the Autonomous Node to transition to a custom sub-Workflow (`global.checkout`) when the user wants to checkout with their current cart:
```markdown Instructions wrap theme={null}
When the user wants to checkout with their current cart, use `global.checkout`.
```
This pattern is for leaving the Autonomous Node for a structured sub-Workflow after saving a value from the conversation. The Autonomous Node needs [read and write access](#give-access-to-variables) to the variable you mention:
```markdown Instructions wrap theme={null}
When the user asks for deeper details about an email they mentioned, use `workflow.transition` to move to the **Enrich contact** Node. Before transitioning, set `workflow.requestedEmail` to that email address.
```
Replace the Node name, variable name, and trigger phrase with whatever matches your bot.
This prompt combines `global.Message` with `workflow.transition` when the user picks a numeric option. Connect each target with a **Transition** card on the canvas first so `workflow.transition` is valid:
```markdown Instructions wrap theme={null}
If the user sends **1**, thank them briefly with `global.Message`, then use `workflow.transition` to go to the **Self-serve** node. If they send **2**, use `workflow.transition` to go to the **Guided setup** node.
```
You can also directly refer refer to any tools from external integrations.
This prompt tells the Autonomous Node to start a [Human-in-the-loop (HITL)](/integrations/integration-guides/hitl/introduction) session when the user indicates they'd like to speak to a live agent:
```markdown Instructions wrap theme={null}
When the user indicates they'd like to speak to a live agent, use `hitl.startHitl`.
```
***
## Example instructions
Here's an example of complete instructions for an Autonomous Node:
```markdown Instructions expandable wrap theme={null}
## Identity
You are the Customer Support AI Agent for [COMPANY NAME]. Your role is to interact with customers, address their inquiries, and provide assistance with common support topics.
## Scope
- Focus on customer inquiries about orders, billing, account issues, and general support.
- Don't handle advanced technical support or sensitive financial issues.
- Redirect or escalate issues outside your expertise to a human agent.
## Responsibility
- Initiate interactions with a friendly greeting.
- Guide the conversation based on customer needs.
- Provide accurate and concise information.
- Escalate to a human agent when customer inquiries exceed your capabilities.
## Response Style
- Maintain a friendly, clear, and professional tone.
- Keep responses brief and to the point.
- Use buttons for quick replies and easy navigation whenever possible.
## Ability
- Delegate specialized tasks to AI-Associates or escalate to a human when needed.
## Guardrails
- **Privacy**: Respect customer privacy; only request personal data if absolutely necessary.
- **Accuracy**: Provide verified and factual responses coming from Knowledge Base or official sources. Avoid speculation.
## Instructions
- **Greeting**: Start every conversation with a friendly welcome.
_Example_: "Hi, welcome to [COMPANY NAME] Support! How can I help you today?"
- **Escalation**: When a customer query becomes too complex or sensitive, notify the customer that you'll escalate the conversation to a human agent.
_Example_: "I’m having trouble resolving this. Let me get a human agent to assist you further."
- **Closing**: End interactions by confirming that the customer's issue has been addressed.
_Example_: "Is there anything else I can help you with today?"
```
***
## Troubleshooting
This section contains troubleshooting tips to understand how your Autonomous Node is behaving, why it made certain decisions, and how you can course-correct when it's not behaving as expected.
### Check the Inspect window
The **Inspect** window displays information about the Autonomous Node's process, reasoning, and functions. If you notice that the Node isn’t responding correctly or seems to ignore certain instructions, inspecting will reveal whether it has misunderstood the prompt or failed to execute a specific tool.
To access the **Inspect** window:
1. Start a chat with your bot in the Studio's [emulator](/studio/concepts/emulator).
2. Select **Inspect** on any of its responses.
Here's a breakdown of how to use the **Inspect** window:
This section displays all tools available to the Autonomous Node. Each time you add a new Card or make a change to the Node's configuration, the **Tools** list is updated.
* Ensure that the tools listed match what you expect to be available in the Node's decision-making process.
* Ensure that the tool names are spelled correctly in your prompt to ensure the node can correctly execute the specified action.
The Autonomous Node typically tries to execute all instructions within one or two iterations. The number of iterations depends on the complexity of the prompt and how the Node analyzes it.
For more complex tasks, the Node might take multiple iterations to gather data, make decisions, or fetch external information.
By reviewing the Iterations tab, you can understand:
* How many iterations were required for the Node to reach its final decision
* What caused the Node to take multiple steps (e.g., fetching additional data from tools like `global.search` or `browser.webSearch`)
* Why a particular outcome was achieved
### Choose the right model
Lower-performance LLMs may struggle with the complexity of operations typically executed by the Autonomous Node. For this reason, we recommend using a high-performing model to power Autonomous Nodes, roughly equivalent to a model like OpenAI's GPT-4.1.
A smaller LLM might result in parts of the prompt being truncated, specifically the definition wrapper that Botpress adds to ensure the LLM understands how the tools function, or what parameters are required.
### Check your LLMz version
Always make sure you are using the latest stable version of LLMz. This is the autonomous engine that directs the Autonomous Node to work. It also contains bug fixes, making the prompts more agnostic to variance between LLMs.
You can check/change your LLMz version in your [Bot Settings](/studio/concepts/bot-settings#llmz-version).